Introduction to Stopping on Ice Skates
Learning how to stop properly is one of the most important skills for any ice skater to master, whether you’re a complete beginner or a more experienced skater looking to improve your technique. Knowing how to stop confidently not only allows you to control your speed and direction on the ice, but is also critical for your safety and the safety of others around you.
Why Learning to Stop is Important
Stopping is an essential ice skating skill for several reasons:
- It allows you to control your speed and avoid collisions with other skaters
- It enables you to change direction quickly and navigate crowded ice rinks
- It gives you the confidence to skate more freely and try new techniques
- It’s a fundamental building block for more advanced skating maneuvers
Without proper stopping techniques, beginner skaters can quickly lose control, leading to falls and potential injuries. That’s why it’s so important to prioritize learning how to stop early in your skating journey.
Common Challenges for Beginners
Learning to stop on ice skates can be intimidating for beginners. Some common challenges include:
- Fear of falling – The slippery nature of ice can make new skaters feel unsteady and afraid of losing their balance.
- Lack of control – Without proper technique, it can feel like you’re at the mercy of your momentum on the ice.
- Difficulty applying pressure – Stopping requires putting pressure on the ice with your blades, which can feel unnatural at first.
- Confusion about foot positioning – Each stopping technique requires specific foot movements that take practice to master.
The good news is that with instruction and repetition, anyone can learn to overcome these challenges and become confident stopping on ice skates.
Basic Stopping Techniques
Snowplow Stop
The snowplow stop (also known as the wedge stop) is usually the first stopping technique taught to beginner skaters. It involves pointing your toes inward to create an inverted “V” shape with your skates.
This basic position generates friction against the ice, slowing you down. The snowplow stop is effective at slower speeds and is a great confidence-builder for new skaters.
Step-by-Step Guide to the Snowplow Stop
Here’s how to perform the snowplow stop:
- Get into basic position – Skate forward with your feet shoulder-width apart, knees slightly bent.
- Rotate toes inward – Turn your toes in toward each other so your skates form an inverted “V” shape. Keep your heels apart.
- Apply pressure – Press down and out equally with the inside edges of both skates. Imagine you’re trying to push loose snow to the side, like a snowplow.
- Increase pressure to stop – More pressure equals more stopping power. Continue pressing with both feet until you come to a full stop.
- Return to forward position – Once stopped, return your feet to a forward facing position before skating on.
Common Mistakes and How to Avoid Them
When learning the snowplow stop, you may encounter a few typical problems:
- Leaning too far back – This causes your weight to shift away from your skates’ blades, making the stop less effective. Stay centered over your feet.
- Lifting your skates off the ice – Both skates must maintain contact with the ice to properly plow through the stop. Focus on pressing down and out.
- Not applying equal pressure – The stop will pull you to one side if you press harder with one foot. Mirror the pressure on both skates.
- Pointing toes too inward – If your toes point directly at each other, your blades can’t shave the ice properly. Aim for a slight V shape instead.
Intermediate Stopping Techniques
As you become more comfortable on your skates, you’ll be ready to learn some intermediate level stopping techniques that are effective at higher speeds. Two of the most common are the hockey stop and T stop.
Hockey Stop
The hockey stop is an efficient technique to stop quickly when skating at a fast pace. As the name suggests, it’s commonly used by ice hockey players who need to change directions on a dime.
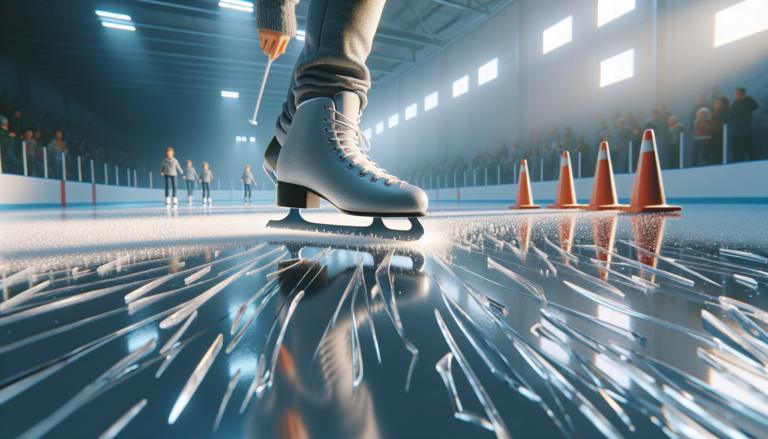
The hockey stop involves quickly turning your skates perpendicular to your forward momentum, causing the blades to shave the ice and bring you to a sharp, controlled stop.
Step-by-Step Guide to the Hockey Stop
Follow these steps to execute a basic hockey stop:
- Gain speed – You’ll need decent forward velocity to perform an effective hockey stop. Skate in a straight line to build momentum.
- Rotate 90 degrees – When you’re ready to stop, quickly rotate your hips and shoulders 90 degrees in the direction you want to stop. If stopping to the left, rotate counterclockwise. To stop right, rotate clockwise.
- Dig in your edges – As you turn, press down firmly with the inside edges of both skates. Your blades should be perpendicular to your original direction of travel, shaving the ice.
- Lean into the stop – Shift your weight over your skates in the direction of the stop. The more you lean, the more powerfully you will stop.
- Come to a complete stop – Continue pressing your edges into the ice until you come to a full halt. Keep your head up and maintain your balance.
T Stop
The T stop is another effective intermediate stopping technique. It gets its name from the “T” shape your skates make during the stopping motion.
Unlike the snowplow and hockey stops which use both feet symmetrically, the T stop relies mainly on one foot to provide stopping power while the other foot assists with stability and guidance.
Step-by-Step Guide to the T Stop
To perform a T stop, follow this sequence:
- Identify your dominant foot – Decide which foot feels most comfortable applying pressure to the ice. This will be your stopping, or dragging, foot. The other foot is your gliding foot.
- Shift your weight – Transfer most of your weight onto your gliding foot as you prepare to stop.
- Rotate dragging foot – Turn your dragging foot perpendicular to your gliding foot, forming a “T” shape. The dragging foot should be behind and slightly to the side of your gliding foot.
- Press into the ice – Apply firm, steady pressure to the ice with the inside edge of your dragging foot. Avoid stomping or jabbing motions.
- Control the stop – Gradually apply more pressure with your dragging foot as needed to bring yourself to a stop. Keep your weight over your gliding foot for stability.
Advanced Stopping Techniques
Once you’ve mastered the snowplow, hockey, and T stops, you may want to add some more advanced stopping techniques to your repertoire, like the tango stop.
Tango Stop
The tango stop is a stylish, fluid stopping technique often used by figure skaters. It’s called the “tango” because the feet mimic dance steps made during the tango.
The tango stop is executed by tracing a “half circle and a half heart” pattern on the ice. One skate cuts a semi-circle while the other scribes a teardrop shape just behind it, using its inside edge to shave the ice and control the stop.
Step-by-Step Guide to the Tango Stop
Here’s how to perform a basic tango stop:
- Skate backwards – The tango stop is usually initiated from a backward skating position, so you’ll need to be comfortable with backward crossovers.
- Cut a semicircle – With your leading foot (the foot in front), cut a clean semicircle on the ice by pressing your outside edge and leaning in the direction of travel.
- Shift to inside edge – As your leading foot finishes its half circle, shift your weight to the inside edge of your trailing foot.
- Draw the “heart” – Use the inside edge of your trailing foot to scribe a teardrop or “half heart” shape just behind your leading foot’s semicircle.
- Complete the stop – Put more pressure on the inside edge of your trailing foot as you finish drawing the heart, allowing the blade to shave the ice and bring you to a graceful stop.
Safety Tips for Stopping on Ice Skates
While learning to stop is essential for ice skating safety, it’s important to keep some key safety principles in mind as you practice your stopping techniques.
Avoiding High Speeds
As a beginner, resist the urge to skate too fast. High speeds make it more difficult to control your stops and put you at greater risk of injury if you fall.
Skate at a moderate, comfortable pace as you master your stopping techniques. You can gradually increase your speed as your skills and confidence grow.
Proper Posture and Balance
Maintaining proper posture and balance is key to performing controlled, stable stops on the ice. Some tips:
- Keep your knees bent – Bent knees act like shock absorbers and give you a lower center of gravity for better stability.
- Lean slightly forward – Avoid leaning too far back on your skates, which can cause you to lose your balance and fall.
- Keep your head up – Look ahead in the direction you’re traveling, not down at your feet. This helps you stay balanced and avoid collisions.
- Arms out for balance – Extend your arms out to your sides for added stability during your stops.
Practice and Building Confidence
Like any new skill, mastering stopping techniques on ice skates takes practice and patience. The more you work at it, the more confident and controlled you will feel on the ice.
Gradual Pressure on Stopping Foot
When you’re first learning a new stopping technique, start applying pressure gradually with your stopping foot or skate.
Slowly increase the pressure as you get a feel for how your skates interact with the ice. Stopping too abruptly can throw off your balance.
As you practice each stop, focus on applying smooth, consistent pressure for a more stable, controlled stop.
Community Support and Practice Sessions
Look for opportunities to practice stopping with guidance and support from more experienced skaters or instructors.
Many ice rinks offer group lessons for beginners to learn the fundamentals of ice skating, including stops. Skating clubs may also host supervised practice sessions where you can hone your skills in a safe environment.
Don’t be afraid to ask for feedback or tips from coaches or advanced skaters. The ice skating community is often very happy to nurture new talent!
Equipment and Maintenance
Having the right ice skating equipment and keeping it well-maintained can make a big difference in your ability to perform stops safely and effectively.
Importance of Sharpening Your Skates
Sharp skates are essential for executing crisp, clean stops on the ice. Dull blades can cause your skates to slip or skid out of control during stopping motions.
Get your skates sharpened regularly by a professional who understands the requirements of your skating style and skill level. A good rule of thumb is to sharpen after every 15-20 hours of use.
Learning to stop confidently is a critical part of becoming a safe, skilled ice skater. Master these techniques and you’ll be well on your way to skating success!
Recommended Skates for Beginners
As a beginner, you may be overwhelmed by the variety of ice skates on the market. A proper fit is essential for comfort, support, and control on the ice.
While you don’t need top-of-the-line skates right away, investing in a quality pair from a reputable brand can enhance your learning experience. Some recommendations for beginners:
| Brand | Model | Features |
|---|---|---|
| Jackson | Ultima Softec Classic | Padded tongue for comfort, stainless steel blades |
| Riedell | Emerald Recreational Ice Skates | Padded lining, support ankle collar, stainless steel blades |
| Lake Placid | Alpine 900 | Woven lining, waterproof sole, stainless steel blades |
Before purchasing skates, visit a pro shop to get fitted by a knowledgeable salesperson. Skates should feel snug and supportive, but not painfully tight.

